Forbo
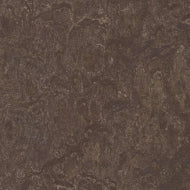
Forbo Marmoleum MCT Flooring Tile 2.0mm
Forbo Marmoleum MCT Flooring Tile 2.0mm
Couldn't load pickup availability
2.0 mm natural linoleum tile
USDA Certified 100% biobased content
Topshield pro occupancy-ready factory finish
Low cost-of-ownership
30-year system service life
53.82 SQ FT per Box. 45 Pieces/ Carton. 28 LBS.
This declaration covers a broad range of designs and colors. Marmoleum is a resilient floor covering complying with all the requirements of EN-ISO 24011: Specification for plain and decorative linoleum. Marmoleum is made from natural raw materials making it preferable ecological floor covering with a beautiful and colorful design. The key raw materials include linseed oil, which comes from the flax plant seeds, gum rosin from pine trees, recycled wood waste of wood from controlled forests and limestone. Because of the use of natural raw materials Marmoleum is biodegradable. Linoleum is produced by Forbo Flooring for more than 150 years and our well known brand Marmoleum is sold worldwide. This declaration refers to Marmoleum sheet of 2.0 and 2.5 mm nominal thickness. Marmoleum is build up in 3 layers. These three layers form one homogeneous product by the cross linking bondings formed during the oxidative curing process: 
Â
1. Surface layer: This layer gives Marmoleum its design and color. After finishing the product at the trimming department a factory finish is applied to protect the surface layer. 2. Intermediate layer: This layer is calendared on the polyester backing. 3. Backing: The backing is a polyester fleece.
Installing Marmoleum® Modular & MCT Flooring Installing Marmoleum® Modular & MCT Flooring v2.10 07/17. Always refer to and follow the recommendations in the General Installation Guidelines section of the Forbo Installation Guide prior to installing Marmoleum® Modular and MCT flooring. Always refer to and follow the recommendations in the Substrate Evaluation and Preparation section of the Forbo Installation Guide prior to installing Marmoleum® Modular and MCT flooring. • Beginning the installation is an implied acceptance of site conditions and liability for any failure directly related to inadequate site conditions becomes the responsibility of the installer and/or flooring contractor. Marmoleum® Modular and MCT flooring may be installed on approved substrates on all grade levels. Store Marmoleum® Modular and MCT cartons unopened. Use Forbo T 940, Sustain 885m, Sustain 1195, Sustain 1299 or 660 adhesive. *Forbo Sustain 1299 NOT suitable for all installations. Refer to the Forbo Sustain 1299 datasheet for more information and contact Forbos Product Support & Education Services before installing with this adhesive. Use a 1/16 x 1/16 x 1/16 square notch trowel to apply the adhesive. Replace the trowel blade when proper coverage is no longer attainable. Use material from the same batch/dye lot. Do not remove more tile from the carton than can be installed in approximately 1 hour. Install cartons in consecutive order. Marmoleum Modular and MCT in the square format have a directional pattern and should be installed in alternating directions (quarter turned). Marmoleum Modular in the rectangular format can be installed in any direction. The tolerance in the sequence of carton numbers should not exceed 100. Tolerance in the sequence of carton numbers for 10 x 10 (25 cm x 25 cm) should not exceed 200. To avoid shading throughout the installation, it is recommended to shuffle tiles from several cartons. Install square tiles in alternating directions (quarter turned). Rectangular tiles can be installed in any direction. Do not allow heavy traffic or rolling loads for a minimum of 72 hours following the installation. For installations over non-porous substrates, additional time may be necessary because the adhesive may take longer to cure. Wait a minimum of five days following the installation before conducting initial cleaning. For installations over non-porous substrates, additional time may be necessary because the adhesive may take longer to dry and cure. Take pride in your work and be Professional at all times. Installation after establishing the starting lines, spread the adhesive using a 1/16 x 1/16 x 1/16 square notch trowel. Be sure to spread adhesive all the way to the starting line without leaving any voids. Begin laying tiles at the starting point, ensuring that the tile is placed exactly along the layout lines. If the first few tiles are not installed accurately, the entire installation will be affected. The tiles must be installed into wet adhesive. Do not spread adhesive in an area larger than can be installed while ensuring 100% wet transfer to the backing of the material. The open time and working time of adhesives will vary depending on site conditions such as ambient temperature and humidity, the porosity of the substrate and air circulation. It is the installers responsibility to make adjustments to specific conditions as may be necessary to ensure 100% wet adhesive transfer to the material backing. A general indication of proper open time is when a light touch produces transfer of adhesive to the finger, but a firm touch will flatten and smear the adhesive. For additional information, refer to the Adhesives section of the Forbo Installation Guide. • A short open time will be necessary. The adhesive should be allowed to develop body before placing the flooring material into the adhesive, but DO NOT ALLOW THE ADHESIVE TO DRY. • Check for adhesive transfer frequently. There must be 100% wet transfer of adhesive to the material backing in order to achieve a secure bond. 100% wet transfer is a continuous film of adhesive, when wet, on both the backing of the material and the substrate with no trace of trowel marks or ridges. The flooring material must remain in contact with the adhesive while the adhesive is drying and curing. Immediately roll the flooring in all directions using a 100 lb. roller to ensure proper adhesive transfer. Additional rolling is required during adhesive setup to ensure that the material is flat and fully adhered. The use of a three-section wall roller or steel seam roller is required at walls, under toe kicks or anywhere the full weight of a 100 lb. roller cannot access or be applied. creating better environments Installing Marmoleum® Modular & MCT Flooring Installing Marmoleum® Modular & MCT Flooring v2.10 07/17 Page 3 of 3 Proper tile placement and rolling will result in a complete explosion of the trowel ridges, creating a continuous flat film of adhesive. Complete transfer of the tile backing will appear as only the impression of the tile backing in the surface of the adhesive. No standing trowel ridges should be visible. The time it takes to mark and cut the border tiles must be considered when planning the installation. Without adequate planning, the working time of the adhesive around the perimeter may be exceeded before the tiles are installed. This will result in an inadequate bond of the perimeter tiles. Always plan the sequence of spreading adhesive so that the perimeter tiles can be cut and placed into the adhesive before the adhesive working time has been exceeded. Remove fresh adhesive residue immediately with a clean white cloth. Dried adhesive can be removed with a clean white cloth and Forbo Adhesive Remover. If this is not available, a solution of properly diluted neutral pH cleaner may be used. The area should then be rinsed with clean, cool water to remove all residues from the floor. NOTE: If using Forbo 660 adhesive, refer to the Adhesives section of the Forbo Installation Guide for additional information.
Â
Share


